
Getting Started with Spidr
The following guide outlines how to start integrating and testing with the Spidr API. It also provides an overview of each environment and prerequisites for access.
Spidr Dev Portal Access
Signing up for the Spidr Dev Portal is the first step in onboarding with Spidr (more information on environments below). The Dev Portal houses your API key and important company/product information.
Create a Sandbox Account & Company
Before you can access the Spidr Sandbox, you'll need to create a Sandbox user and company.
Steps:
- Navigate to https://devportal.gospidr.com/
- Click the 'Sign Up' link
- Enter an email address and password and hit 'Continue'
- You'll be navigated to a 'Tell Us About You' page
- Fill out the form and hit 'Next'
- You'll be navigated to the 'Tell Us About Your Company' page
- Fill out the form and hit 'Next'
- You'll be navigated to the home page of the Dev Portal
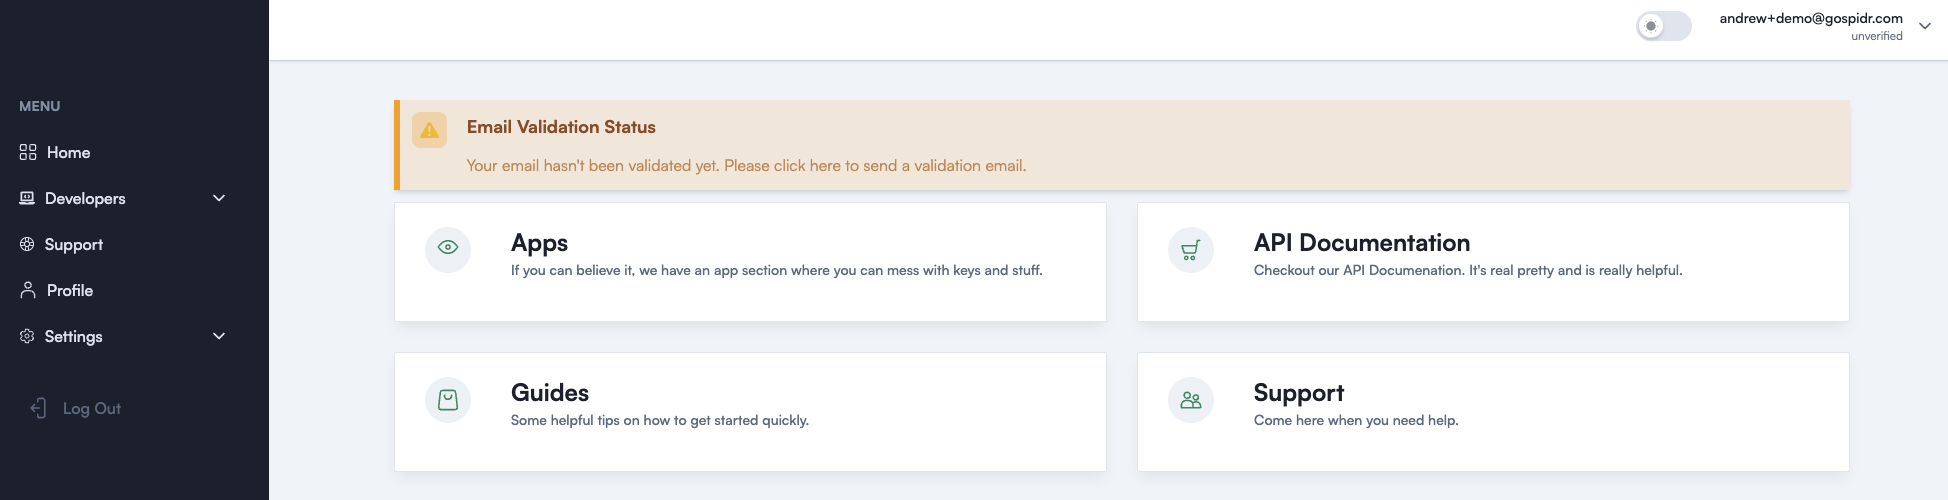
Spidr Dev Portal Homepage
Click the 'Email Validation Status' banner and validate your email. The banner will change to a green 'success' message once the email is sent.
Please Note
After creating your account, you will be assigned the 'owner' role for your company and can invite others to join your team. This is covered in the 'Settings' section below.
Navigating the Dev Portal
The Spidr Dev Portal has four main sections:
Apps & Keys
- Contains all information needed to make Sandbox (and other environment) API calls including:
- Base URL
- API key - You can have up to two keys provisioned at once per environment (just hit the 'Add Token' button). You can delete keys as needed for rotation purposes.
- Product information including the product ID, config IDs for card design and collateral, name, and product type.
Note:
Sandbox products are generated automatically with default values. You will have the opportunity to define your own product parameters as a prerequisite to setting up your CV product. Spidr will work through a Product Setup Guide (PSG) with you to define your CV product values when the time comes.
❗Once you gain access to the CV and Production environments, their respective environment info will also be available via this page.
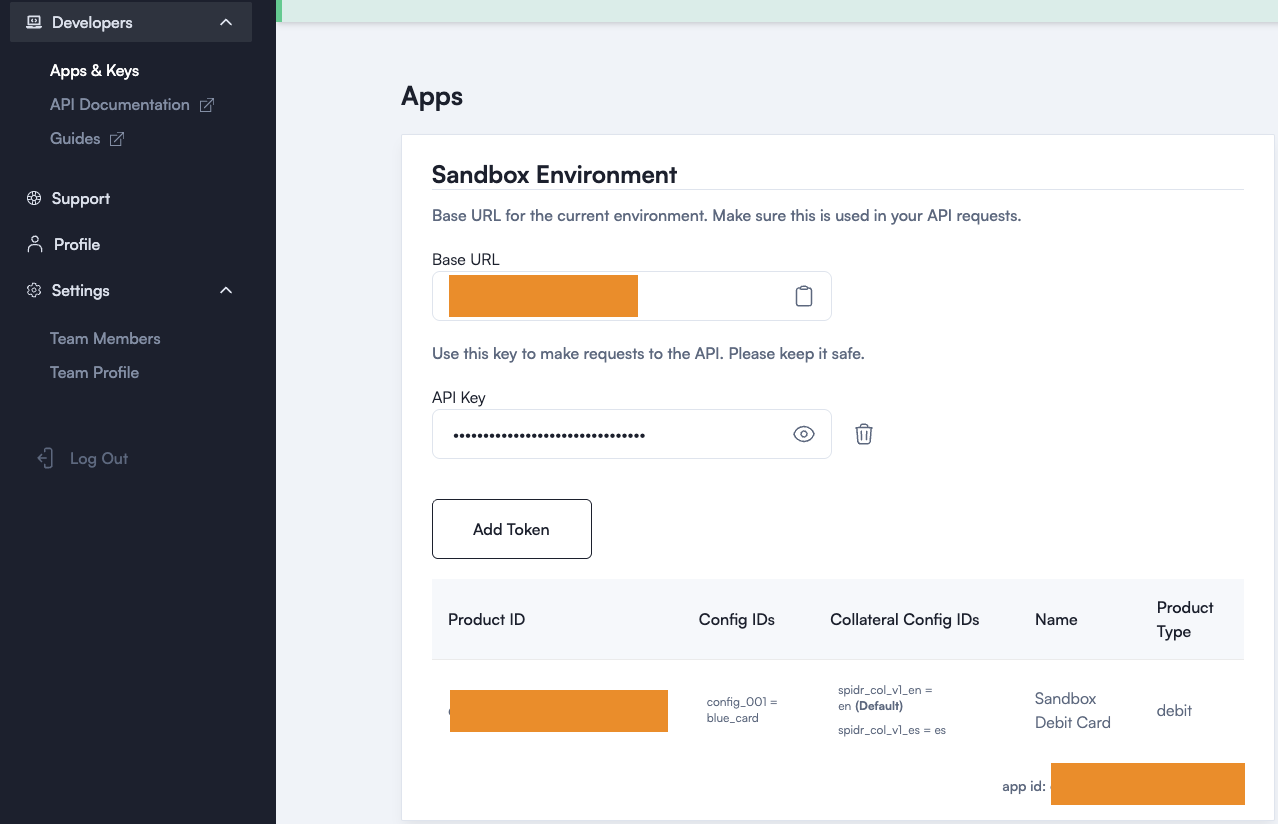
Example Apps & Keys page
Support
Leads to the Spidr Service Desk where you can log tickets/open a case for assistance. Primarily used for post-launch support. Spidr will set up a shared Slack channel for pre-launch collaboration and assistance with any issues.
Profile
Contains your basic profile information. You can update your first name, last name, or phone number via this screen.
Settings
Contains two important sections: 'Team Members' and 'Team Profile.' This is where you'll manage your team, send out invites, and review/update your company information.
Note:
Only 'Owner' roles have access to the 'Settings' Page.
Team Members Page
- This page displays all team members associated with your company, as well as any pending invites.
- To invite someone to your team, simply click the 'Create Invitation' button and enter their email. You can delete any pending invites and resend if there are any issues signing up.
- Once a team member has joined, you can manage their role or delete them within the 'Current Members' table.
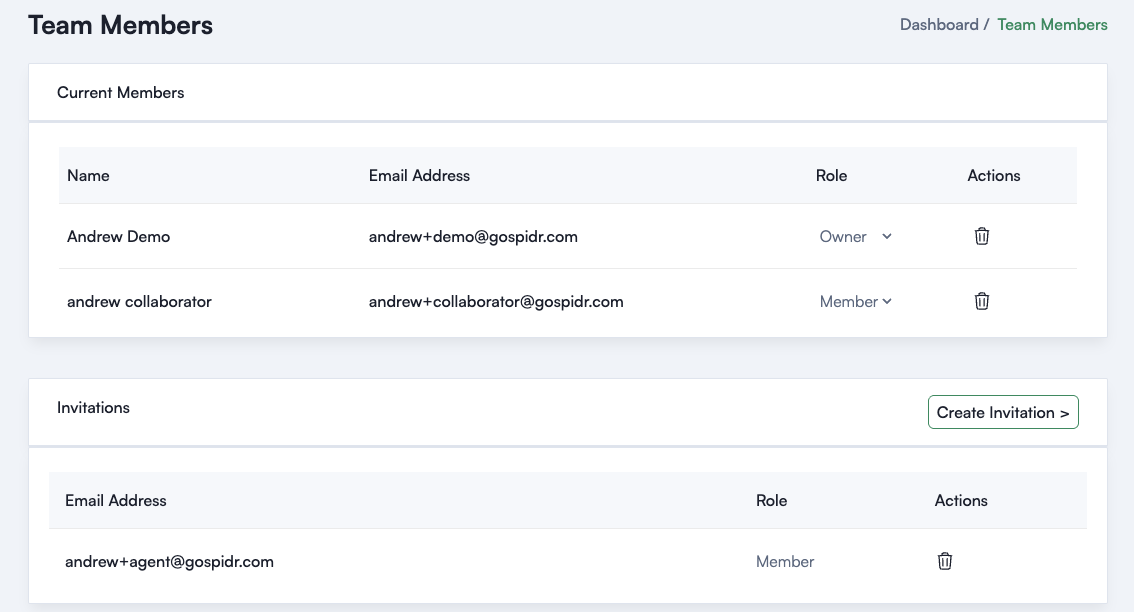
Example Team Members Page
There are two main roles within the Spidr Dev Portal:
- Owner - can invite, delete, and manage team member roles. Has access to the 'Settings' page.
- Member - can see all information within the Dev Portal except for the 'Settings' page. Cannot invite or manage members.
For more information on signing up, see the 'Accepting a Dev Portal Invitation' section below.
Team Profile Page
- Contains details about your company. Used to update your company information if needed.
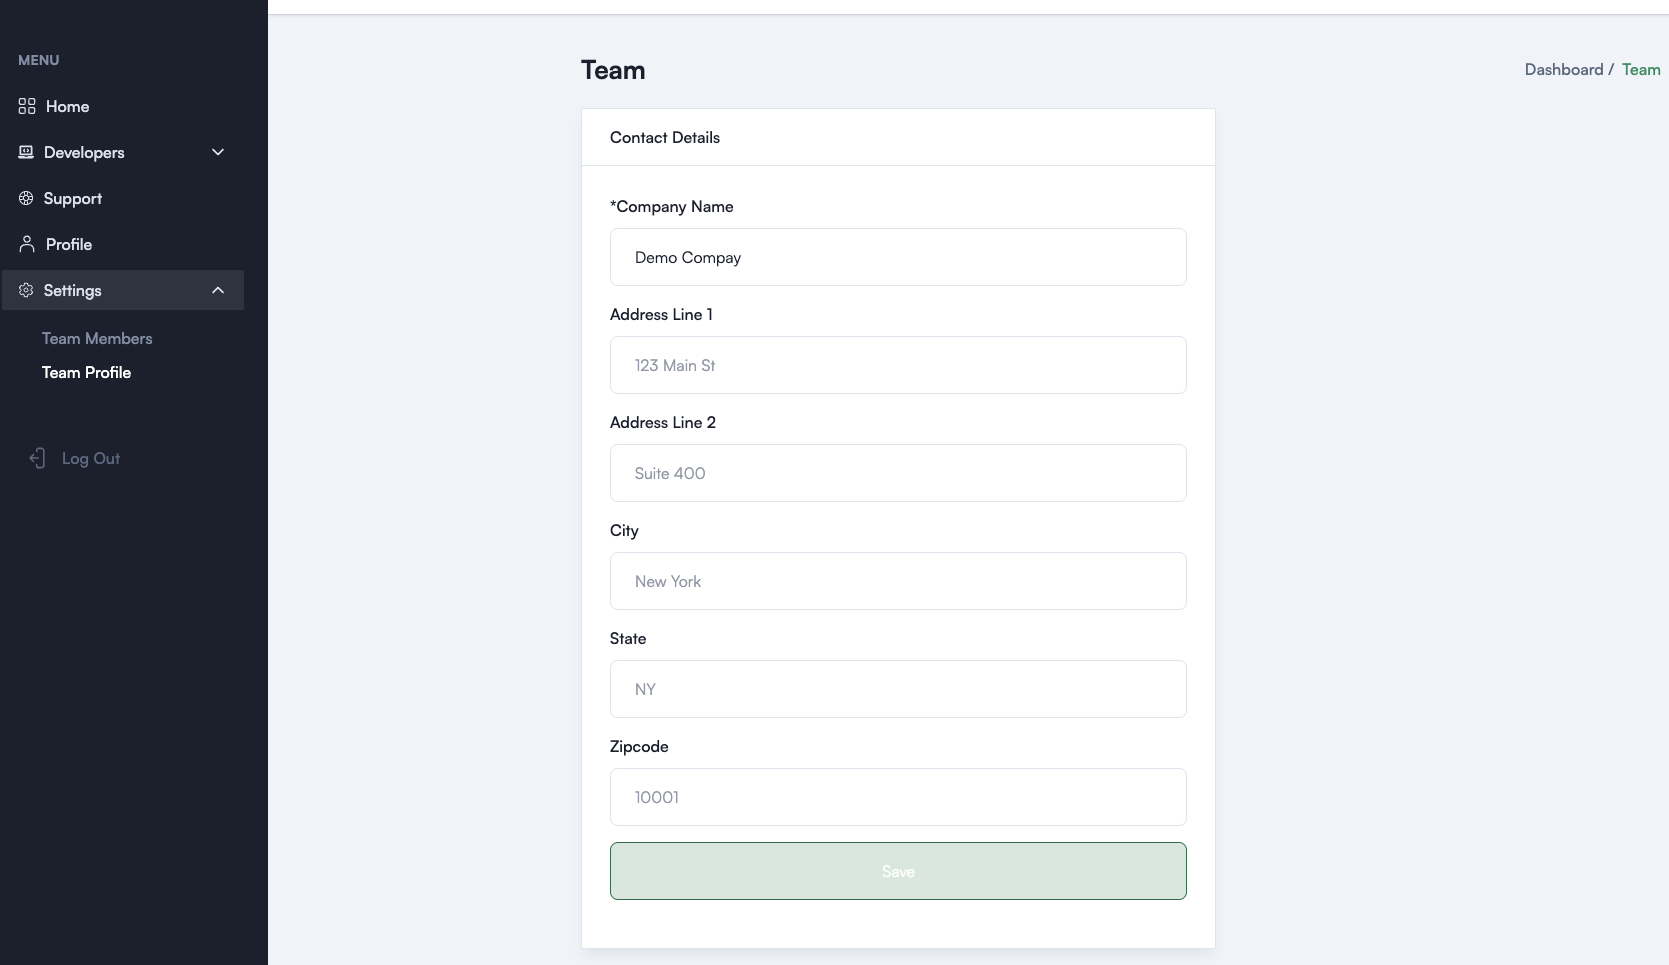
Example Team Profile Page
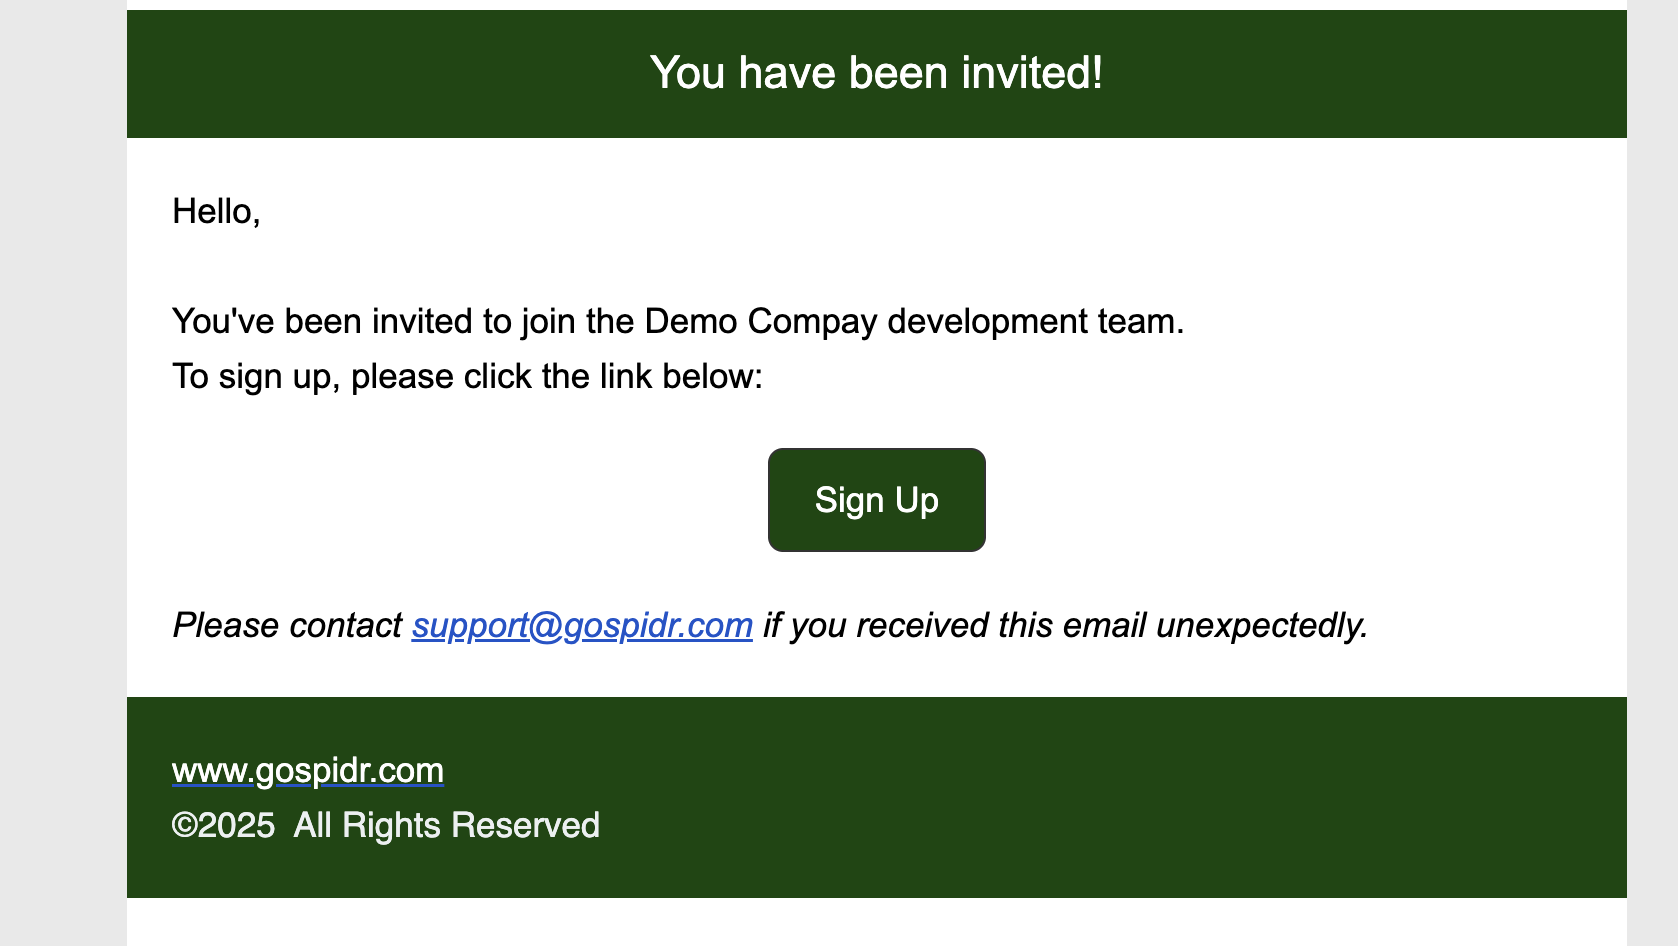
Accepting a Dev Portal Invitation
Once a Spidr Dev Portal company owner invites you to their company, you can sign up by clicking the invitation link sent to your email.
Example Invitation Email
Steps to Sign Up:
- Click 'Sign Up'
- You'll be navigated to a 'Welcome' screen
- Enter your email address and a password you'd like to use for the Dev Portal. Click 'Continue.'
- You'll be navigated to a 'Tell Us About You' page. Enter your information and click 'Next'
- You'll be prompted to accept or decline the invite. Accept and hit 'Next'
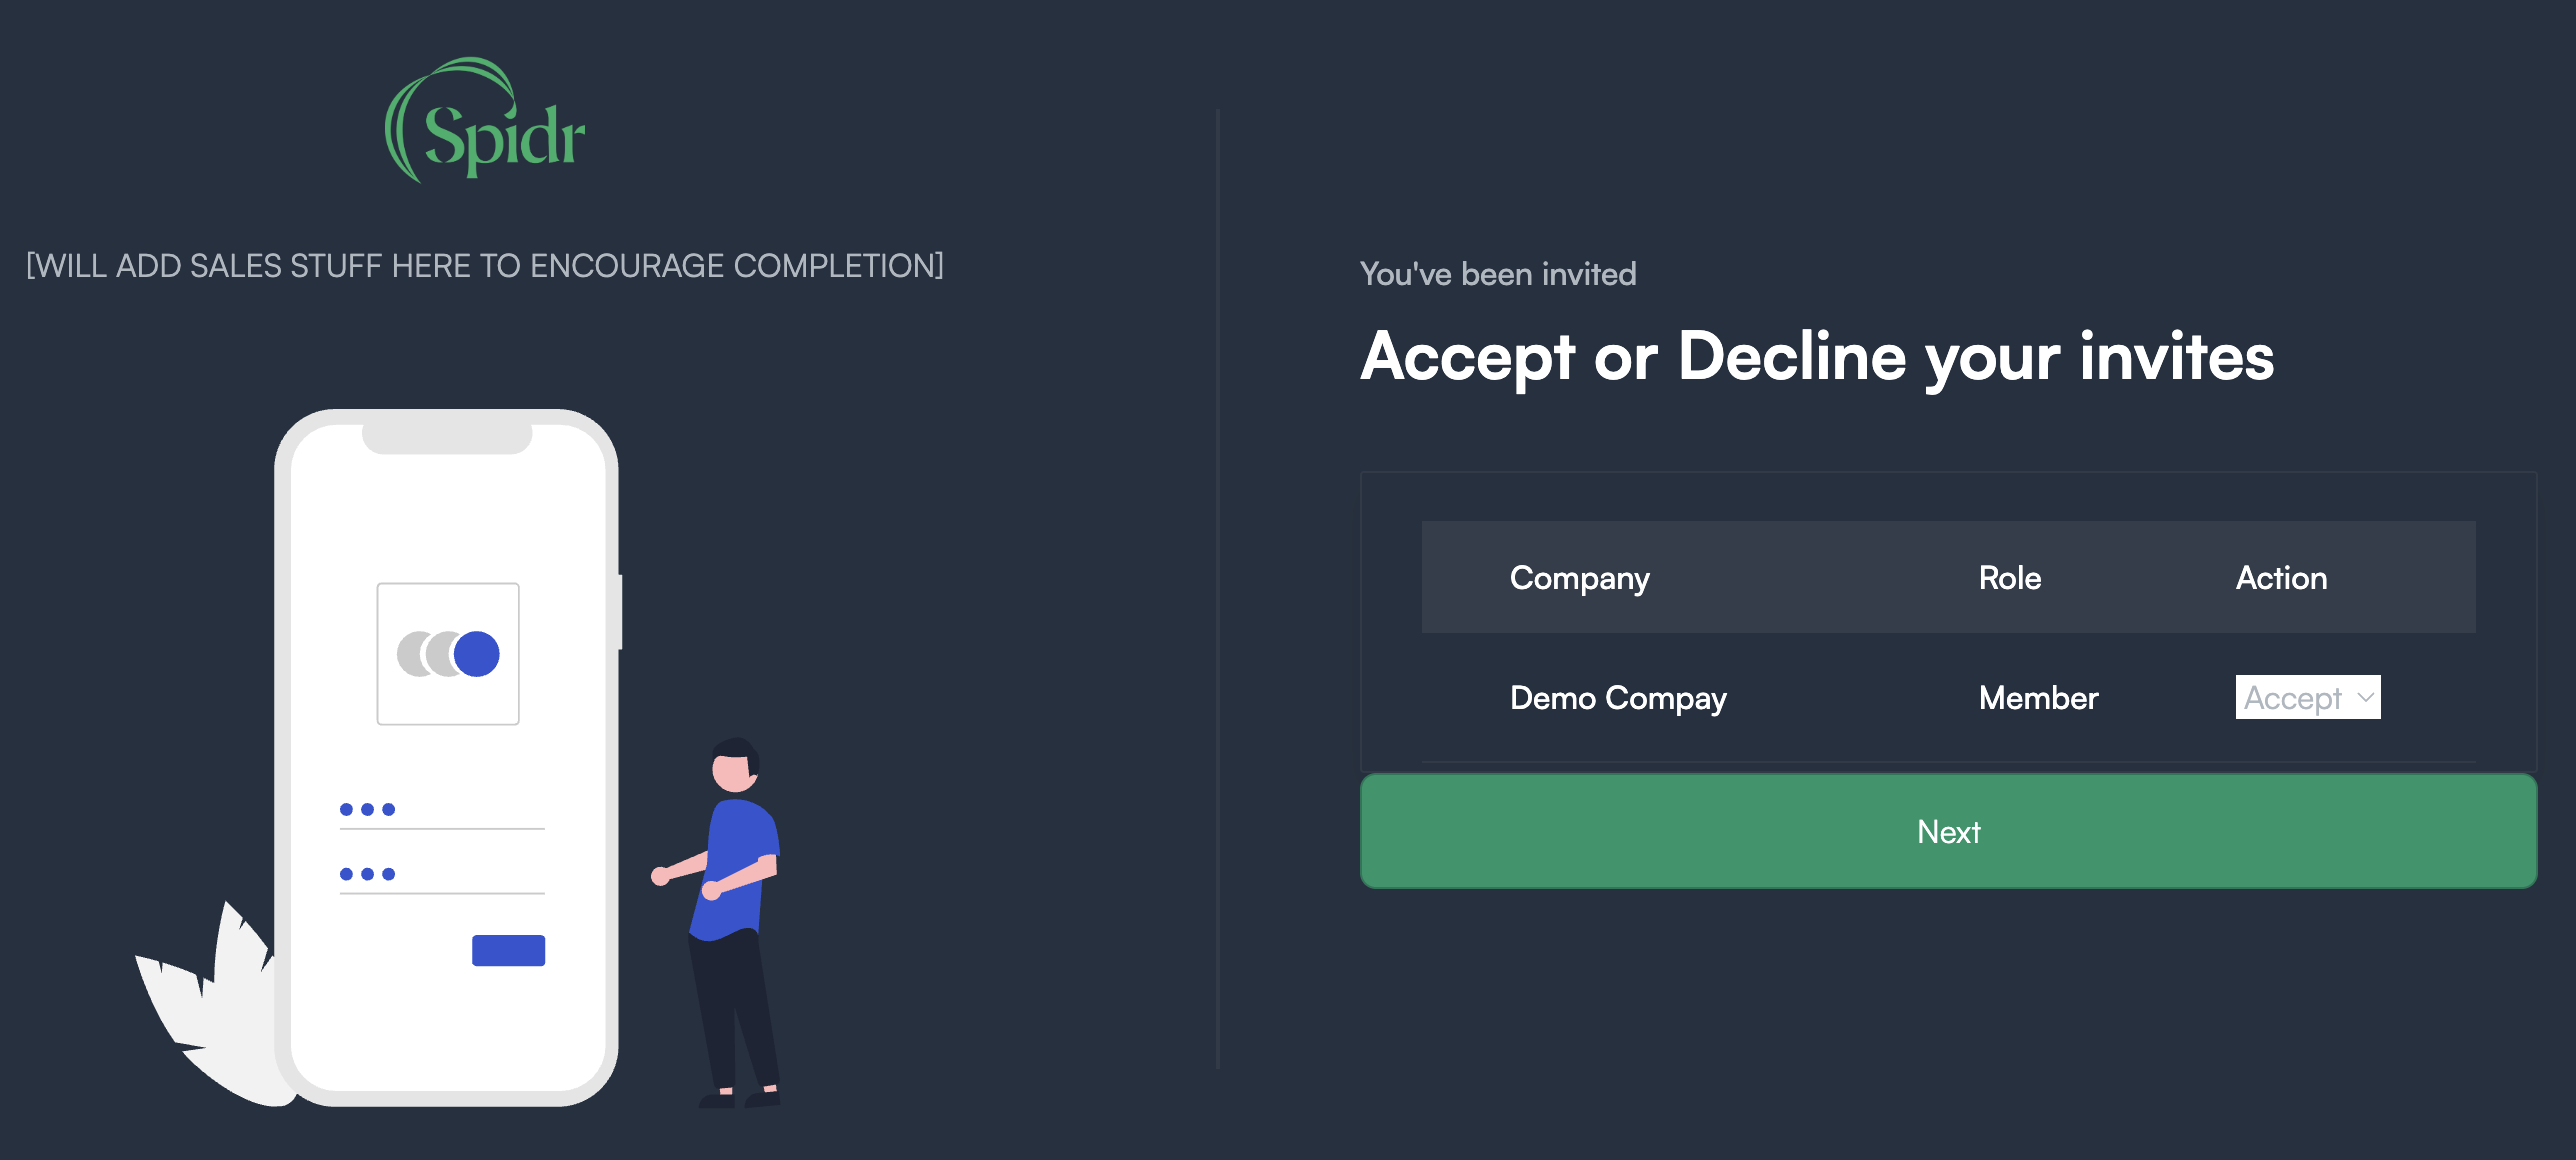
Example invitation page
After hitting 'Next' you'll be navigated to the Spidr Dev Portal home screen. You are officially a member of the company, congrats! 🎉
Environments
There are 3 main environments within Spidr to facilitate proper integration and testing. Each environment has a set of prerequisites that must be satisfied before the environment can be provisioned.
Sandbox
Background
- This is the first environment you'll integrate with. It's meant for learning the basics of the Spidr API and testing core endpoints.
- Once you sign up for the Dev Portal, a Sandbox product is automatically generated for you.
Prerequisites
- You must have a Sandbox Dev Portal account and product to make Sandbox API calls. Please ensure you use the correct API key, base URL, and product ID.
Sandbox Capabilities
Sandbox can be used to explore and integrate with Spidr's core Unified endpoints.
The following capabilities are not available in Sandbox:
- ZTM API - ZTM requires a separate contract and configuration. Once signed and configured, it is available in the CV environment. ZTM information can be found here.
- Webhooks - Webhooks are not available in Sandbox. Webhooks are only fired in CV and Production. See Webhooks for an index of webhook events.
- RDFs - Raw data files (RDFs) are not available in Sandbox or CV. However, Spidr can mock RDF file generation once you have a CV environment to test the connection. More information on RDFs can be found here.
Note: The Sandbox environment is intended for testing and may be periodically reset or refreshed. Data stored here should be considered temporary. Spidr advises against demoing in this environment.
CV
Background
- After you have officially signed with Spidr, you will be provided a client validation (CV) product. Unlike Sandbox, the CV environment is designed to mirror your Production setup and settings. Your CV environment information (base URL, API key, product, etc) can be located in the Dev Portal under 'Apps & Keys' (same page as your Sandbox information).
- Once your product is live in Production, any changes should be first promoted to CV for testing/validation.
Prerequisites
- Signed Spidr contract
- Signed ZTM contract (if using ZTM)
- Completed CV section of Spidr 'Connectivity Guide'
- Completed Product Setup Guide (PSG)
CV Capabilities
CV can be used to fully test Spidr's Unified and ZTM APIs. As part of your CV setup, you'll also gain access to any ZTM vendor dashboards (if applicable). You'll also gain access to the Spidr Service Tool (SST).
The following capabilities are not available in CV:
- RDFs - Raw data files (RDFs) are not available in CV. However, Spidr can mock RDF file generation to test the connection.
Production
Background
- This is the final, most important environment. Production provides access to live data and real transactions.
Prerequisites
- Completed Production section of Spidr 'Connectivity Guide'
- Sponsor/Issuing Bank Approval, including completion and validation of a Production test plan.
Updated 5 months ago